Android - Edit Multiple Contacts
Overview
Occasionally you will need to change more than one person in the group. It is possible to quickly make changes to one, several, or all contacts within a group.
1. Ensure you are in the Group
To start editing contacts, it is necessary to create a new group and add contacts to it or go to an already existing one with contacts. Instructions on how to create a new group can be found in Create New Group.
2. Select Contacts to Edit
Long Press a Contact. Tap and hold a contact until a green checkmark appears next to it.
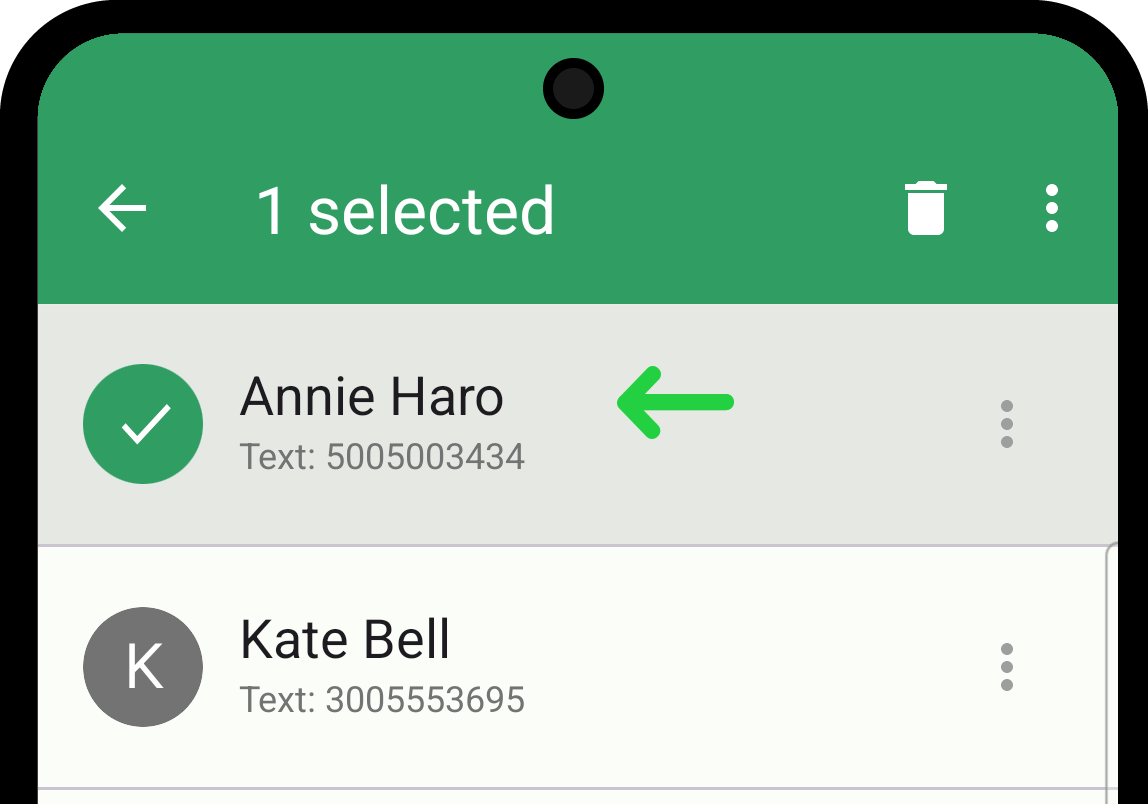
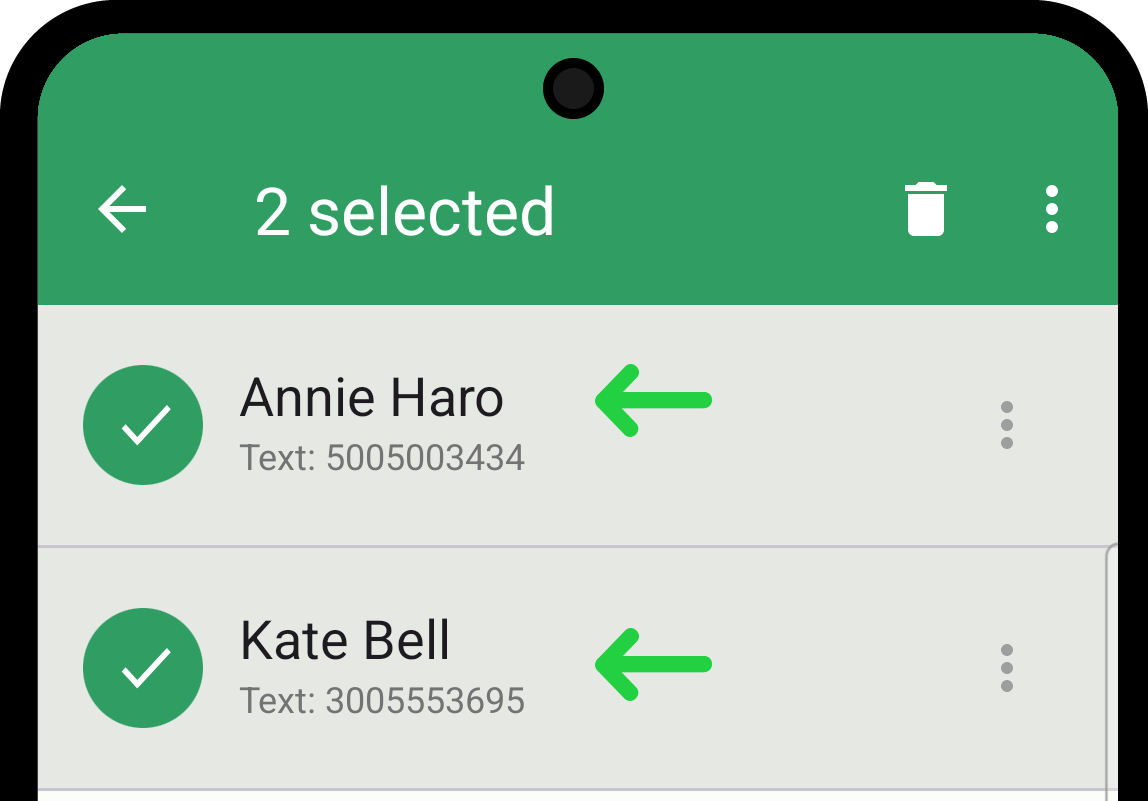
After the first contact is selected, tap on additional contacts to select them. Each selected contact will have a green checkmark next to it.
3. Access the Edit Menu
Tap the button in the upper right corner of the screen to open the context menu.
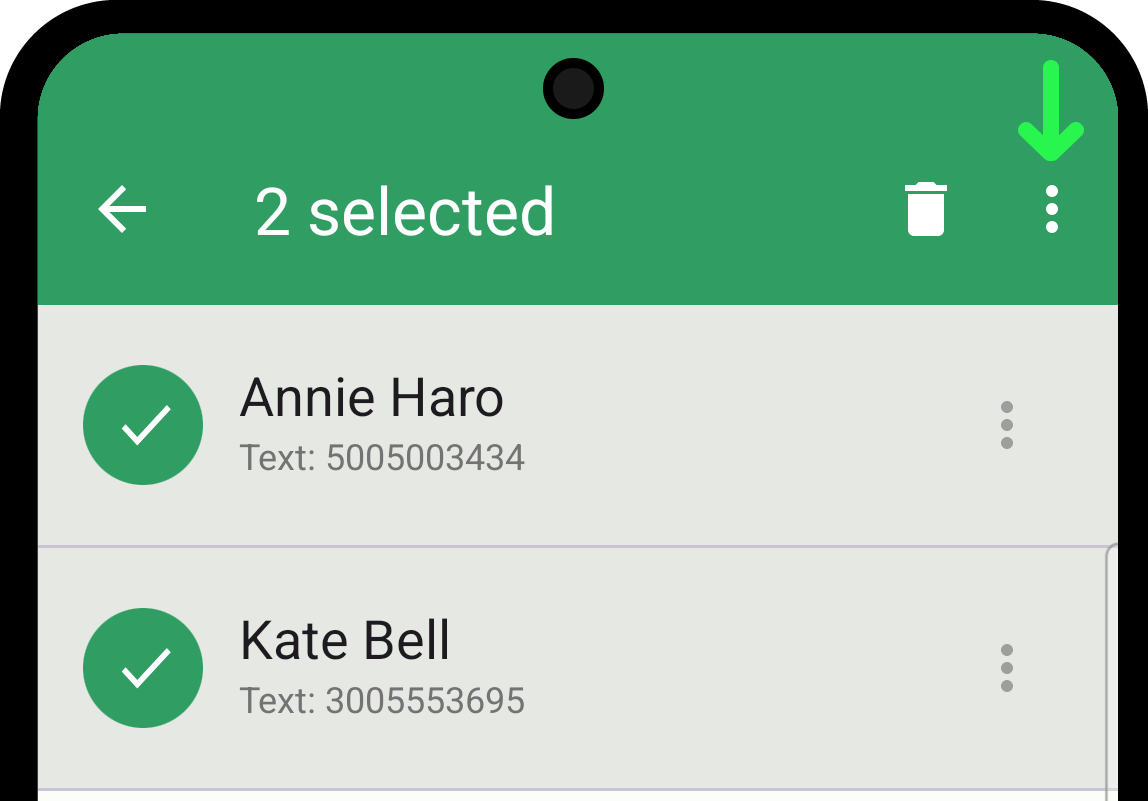
If you select only one contact, the editing single contact page will open. More information about editing an individual contact can be found in Edit Contact.
4. Edit Multiple Contacts
From the context menu, select the "Edit" option. After this the multi-contact edit page will open.

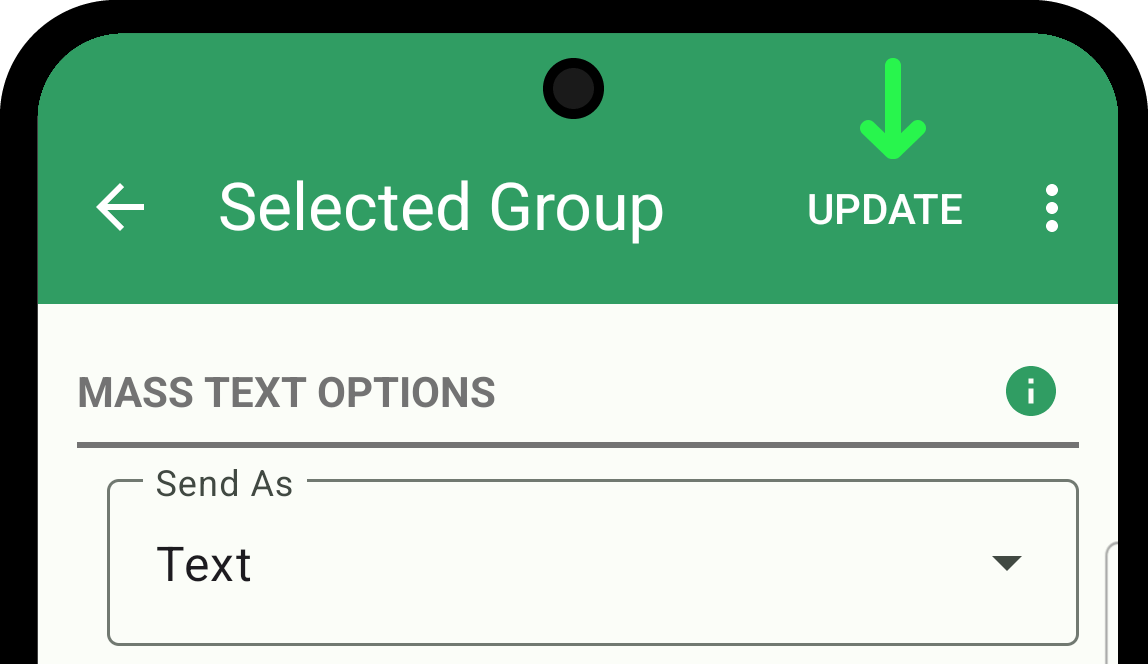
5. Mass Text Options
This section provides options for sending messages to the contacts.
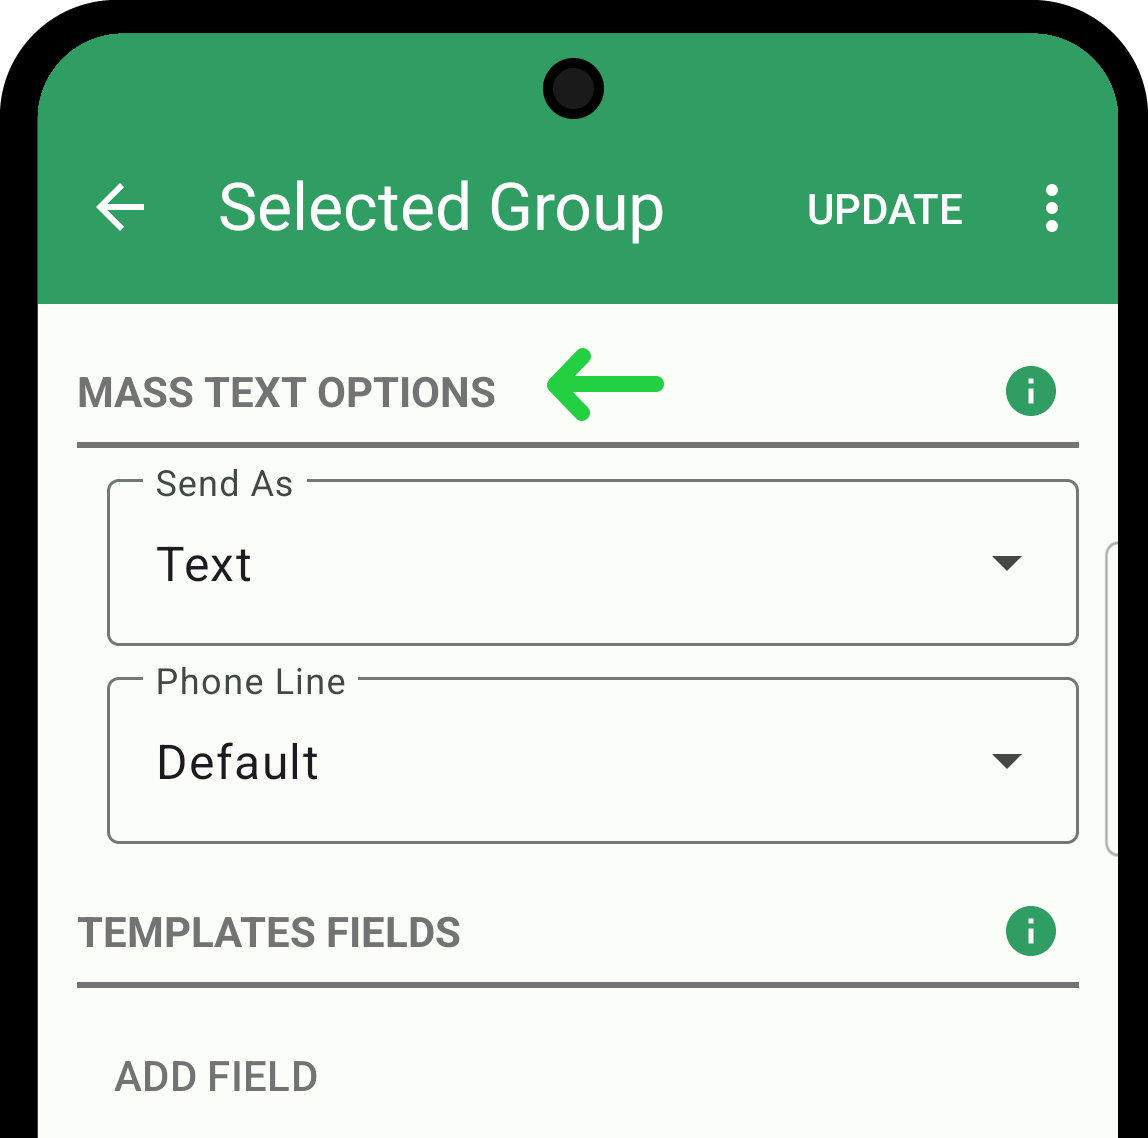
- Send As: Choose the method of sending the message. Options might include Text, WhatsApp, WhatsApp Business, Google Voice, Email.
- Phone Line: Choose the communication line from which the message will be sent. This dropdown is only available if "Text" is selected in the "Send As" menu.
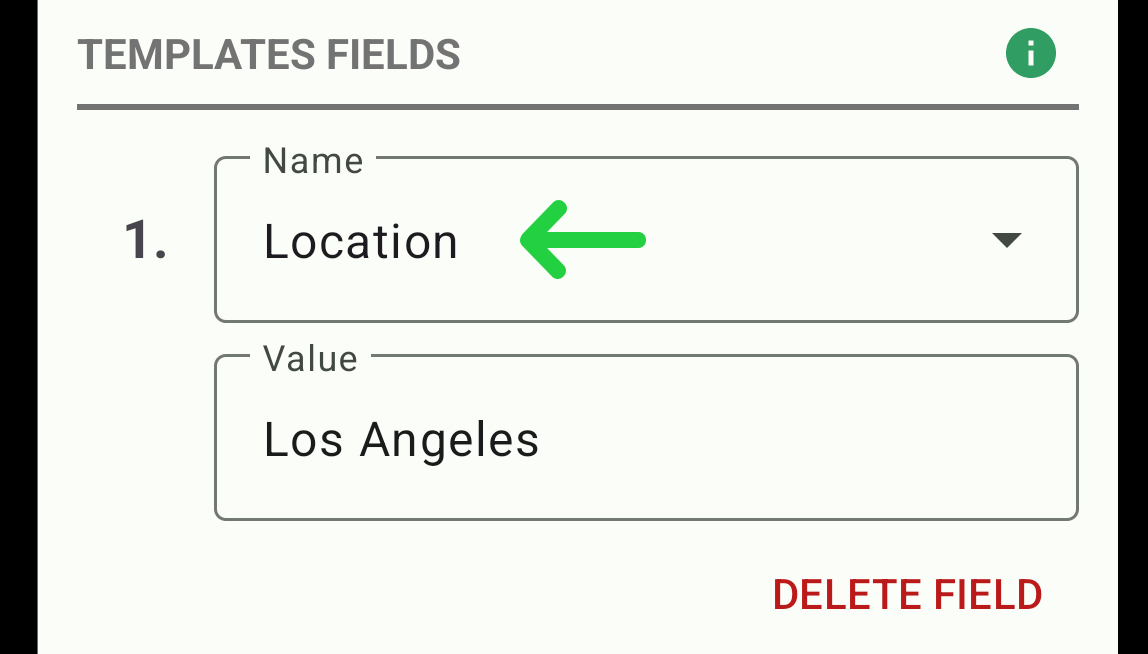
6. Template Fields
The Templates section serves as a flexible resource for creating customized messages for various purposes. When you define templates on the contact's edit page, they appear in a dropdown menu during message composition, enabling their insertion into messages as templates.
To add a new template, tap on the "Add Field" button.

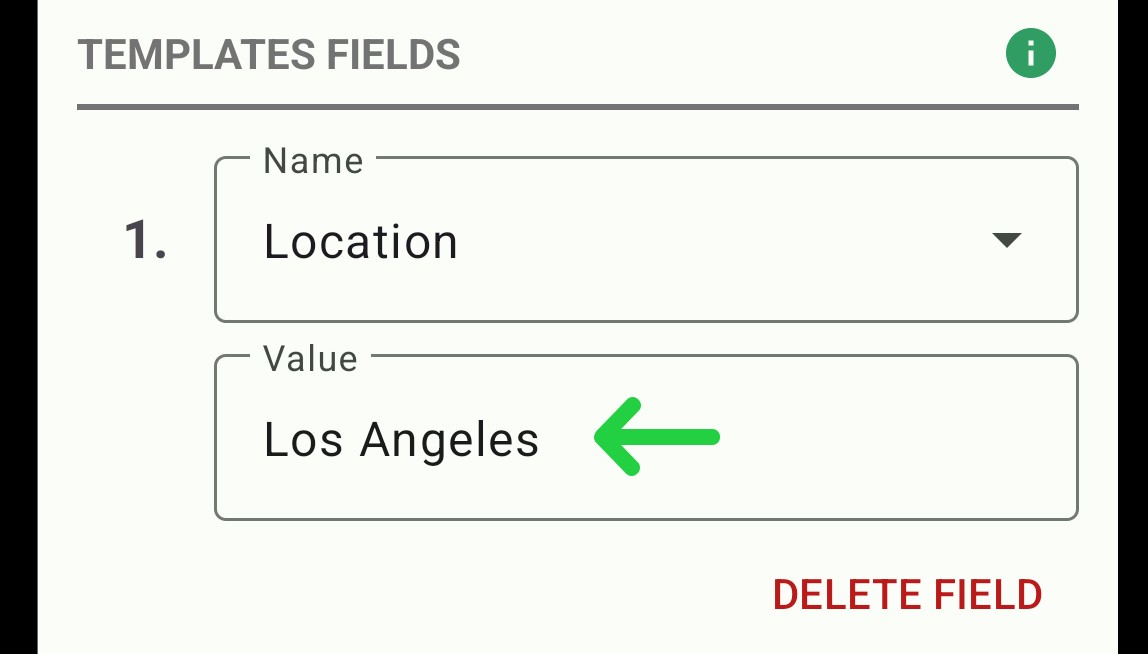
Then, two fields will appear where you can select a template name from the ones provided or enter any other name of your choice and set the value of the template.
- Template Name: You can select a template name from the provided options or enter any other name of your choice.
- Value: Enter the value for the template.
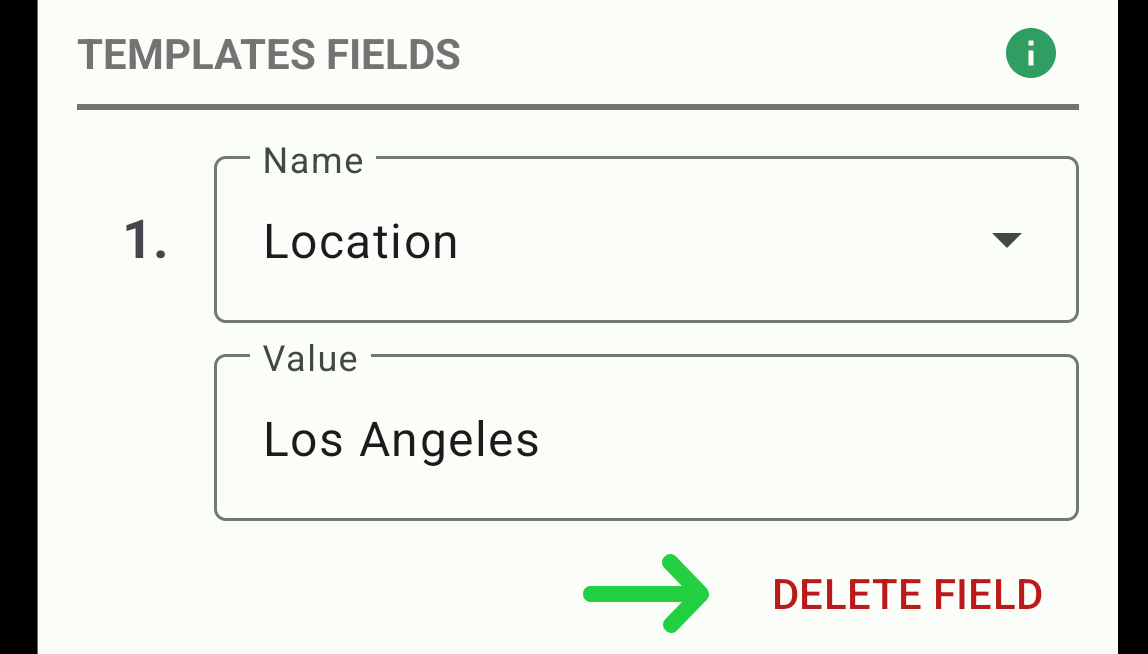
Once at least one template has been added, a "Delete Field" button will appear below the template. Tapping this button will allow you to delete the corresponding template.
You can find an example of a usage template on the Edit Contact page (3. Templates).
7. Finish Editing Contacts
After making the necessary changes, tap the "Update" button in the upper right corner of the screen.